How To Set Up a Rooftop Tent On a 4×4 Land Cruiser
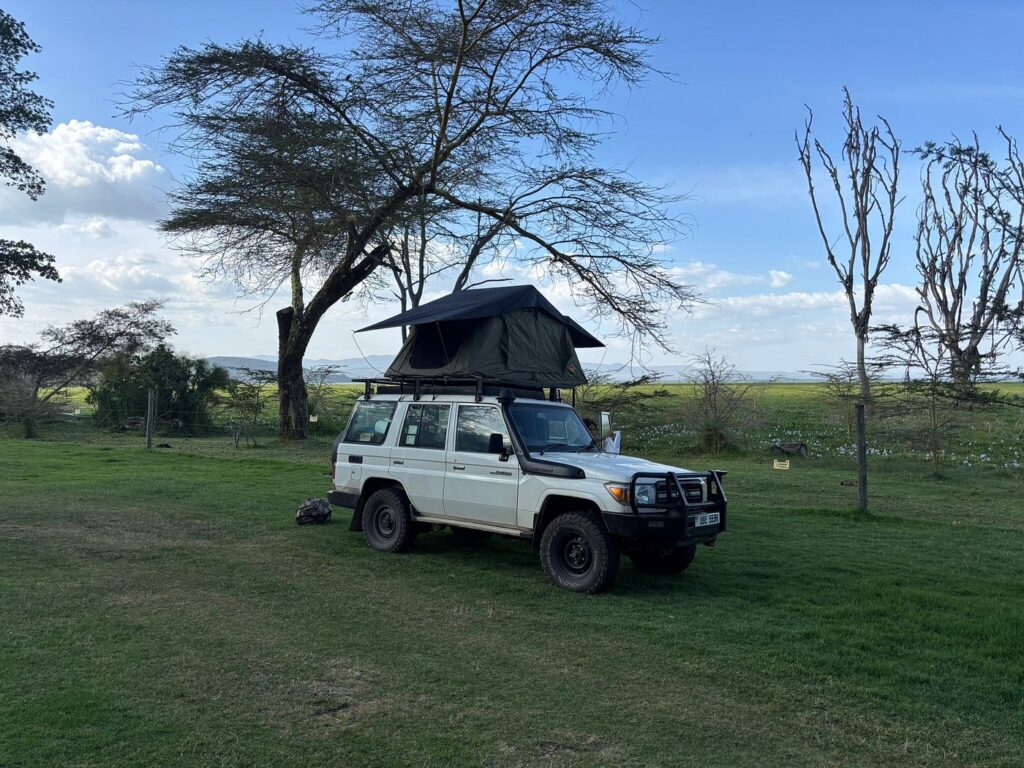
A rooftop tent (RTT) transforms your Toyota Land Cruiser from an everyday 4×4 into a fully self-sufficient overland camping rig. Sleeping elevated off the ground keeps you away from moisture, insects, and uneven terrain, while your vehicle’s roof provides a solid, always-available platform that goes wherever you go.
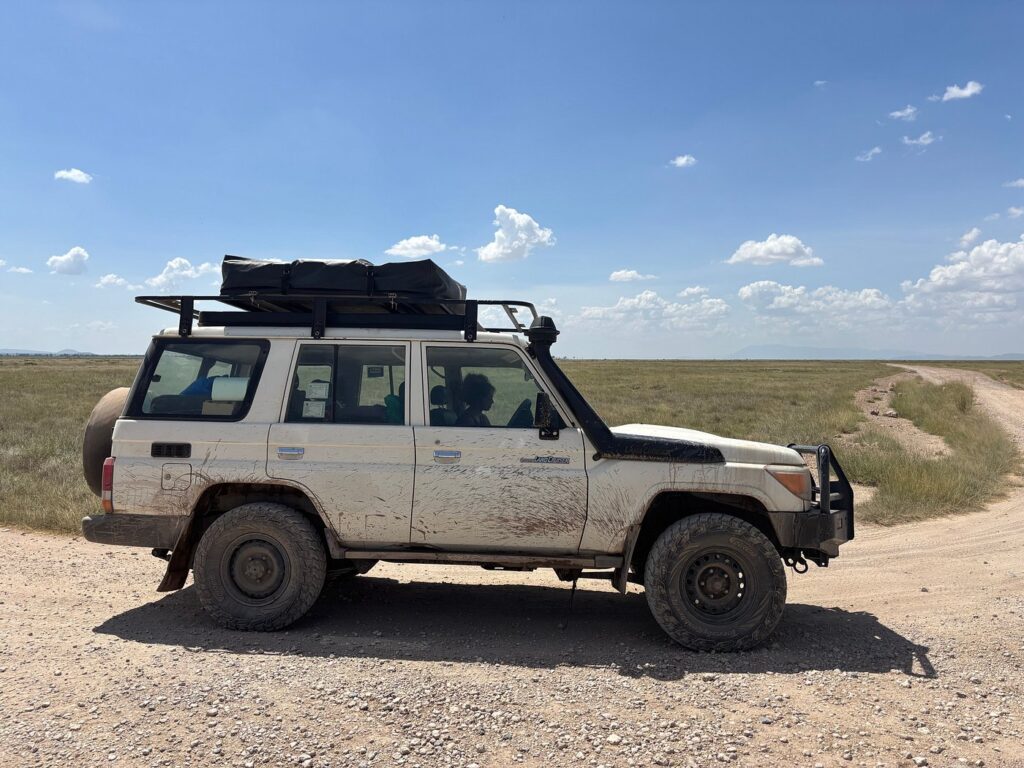
The Land Cruiser is one of the most popular platforms for rooftop tent setups worldwide, thanks to its robust body-on-frame construction, wide roof, strong factory or aftermarket roof racks, and legendary off-road reliability. Whether you own a 70 Series, 76, 79, 80, 100, 200, 300 Series, or a Prado (120/150), this guide covers everything from selecting the right tent to breaking camp efficiently.
Important: Always verify your Land Cruiser’s dynamic roof load rating before purchasing any rooftop tent or rack system. Exceeding the rated load can compromise vehicle handling and structural integrity. |
Understanding Roof Load Ratings
Before purchasing any rooftop tent, the single most critical factor is your vehicle’s roof load capacity. This is often misunderstood and varies significantly between Land Cruiser models.
Static vs Dynamic Load Ratings
Manufacturers publish two distinct roof load figures that are frequently confused:
- Static load rating: the maximum weight the roof can support when the vehicle is stationary. This applies when your tent is deployed and you are sleeping in it.
- Dynamic load rating (driving load): the maximum weight allowed on the roof while the vehicle is in motion. This is typically significantly lower than the static rating.
Example: A 200 Series Land Cruiser may have a static roof load of 300 kg but a dynamic load of only 100 kg. A two-person rooftop tent can weigh 65-90 kg, so ensure your total load including rack, tent, and additional gear stays within the dynamic rating. |
Understanding Roof Load Ratings
Before purchasing any rooftop tent, the single most critical factor is your vehicle’s roof load capacity. This is often misunderstood and varies significantly between Land Cruiser models.
Static vs Dynamic Load Ratings
Manufacturers publish two distinct roof load figures that are frequently confused:
- Static load rating: the maximum weight the roof can support when the vehicle is stationary. This applies when your tent is deployed and you are sleeping in it.
- Dynamic load rating (driving load): the maximum weight allowed on the roof while the vehicle is in motion. This is typically significantly lower than the static rating.
Load Ratings by Common Land Cruiser Model
Model | Typical Dynamic Roof Load (verify in owner manual) |
70 / 76 / 79 Series | 100 kg (aftermarket racks may allow more) |
80 Series | 100 kg dynamic; up to 250 kg static |
100 Series | 100 kg dynamic |
200 Series | 100 kg dynamic; 300 kg static |
300 Series | 75-100 kg dynamic (check handbook) |
Prado 120 / 150 | 100 kg dynamic |
Always confirm the exact figure in your specific vehicle’s owner manual or with a Toyota dealer, as figures vary by market and model year.
Choosing the Right Rooftop Tent
Not all rooftop tents are equal. Selecting the right model for your Land Cruiser involves balancing weight, setup speed, sleeping capacity, and budget.
Types of Rooftop Tents
Soft-Shell (Fold-Out) Tents
Soft-shell tents fold out from a hinged base. They typically offer more sleeping space, better ventilation, and a lower price point, but take longer to set up and are heavier.
- Setup time: 5-15 minutes
- Weight: 45-80 kg
- Best for: Base camping, families, budget-conscious adventurers
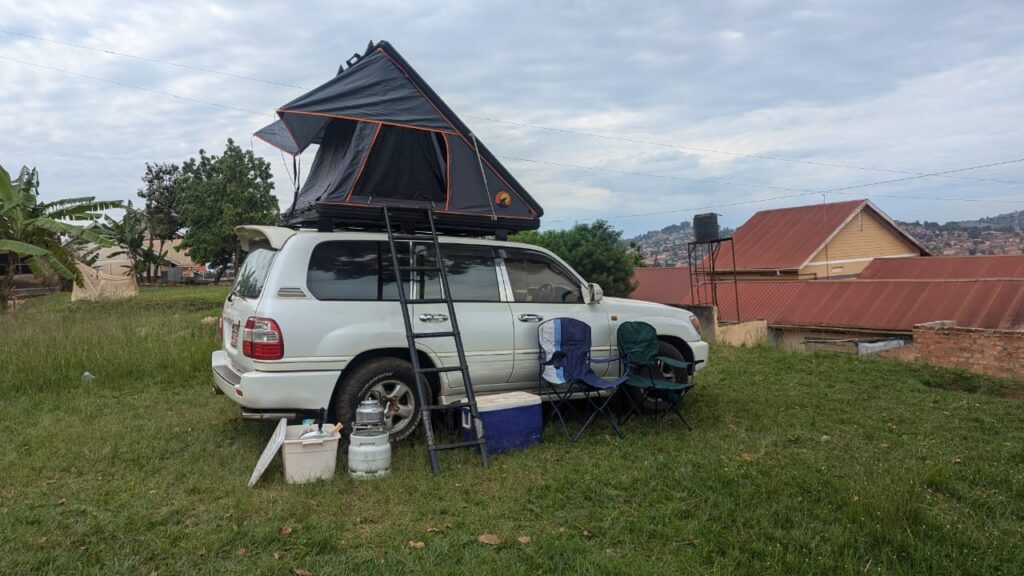
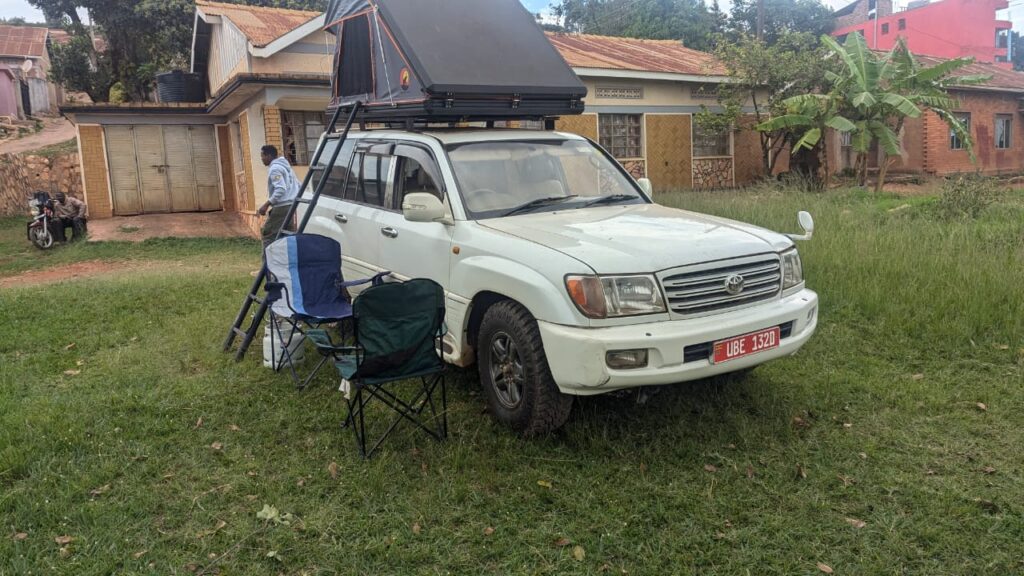
Hard-Shell (Pop-Up) Tents
Hard-shell tents open with a single gas-strut-assisted lift. They are faster to deploy, more aerodynamic, and shed water better, but are generally more expensive.
- Setup time: 30 seconds to 2 minutes
- Weight: 55-100 kg
- Best for: Frequent travelers, solo adventurers, remote expeditions
Hard-Shell Wedge Tents
A hybrid design combining a low profile with quick setup. The tent rises on one side to create a wedge shape, minimising wind resistance and centre of gravity while driving.
- Setup time: Under 1 minute
- Weight: 50-80 kg
- Best for: Long-distance highway driving, frequent setups

Key Specifications to Check
Specification | What to Look For |
Tent weight | Stay within dynamic roof load. Aim under 60 kg for most LC builds. |
Mattress size | Full/double (137×190 cm) or queen (152×203 cm). Measure rack footprint first. |
Shell material | Aluminium composite or ABS for hard shells; 300-600 gsm canvas for soft shells. |
Min. mounting width | Match to cross bar spread (typically 900-1400 mm for most LCs). |
Annex compatibility | Ensure an annex option is available for extra sheltered living space. |
Water resistance | Minimum 3000 mm hydrostatic head; 5000 mm+ for wet climates. |
Selecting and Installing a Roof Rack
A quality roof rack is the foundation of your rooftop tent system. It must handle the combined weight of the tent, occupants, and any additional gear.
Types of Roof Racks for Land Cruisers
Platform Racks
Full-width, flat platforms offering maximum gear storage and mounting flexibility. The most popular choice for serious overlanders. Brands including Rhino-Rack, ARB, Ironman 4×4, and Gobi are well-regarded in the Land Cruiser community.
Gutter-Mount Racks
Ideal for older Land Cruisers (60, 75, 80 Series) with rain gutters. These clamp directly to the gutter without drilling, making installation and removal straightforward.
Track-Mount / Direct-Attach Systems
Used on newer Land Cruisers (200, 300 Series, Prado 150) that lack gutters. These use vehicle-specific mounting points or factory track systems for a secure, flush fit.
Roof Rack Installation: Step-by-Step
Tools required: torque wrench, socket set (10-17 mm), measuring tape, thread-locker (Loctite Blue), rubber mallet, safety glasses.
- Clean the roof surface thoroughly. Remove dirt, wax, or debris from mounting areas using isopropyl alcohol on a clean cloth.
- Position the rack on the roof with an assistant. Centre it front-to-back and side-to-side. Mark the mounting foot positions with masking tape.
- Install roof rack feet or gutter clamps. For gutter-mount racks, seat them squarely on the gutter lip. For track or direct-mount systems, align brackets with factory mounting points.
- Fit rubber sealing pads under each mounting point to protect paintwork and create a weatherproof seal.
- Hand-thread all bolts before tightening to prevent cross-threading and ensure even seating.
- Torque all fasteners to specification (typically 15-25 Nm). Use a calibrated torque wrench and apply Loctite Blue thread-locker.
- Check levelness with a spirit level across the cross bars. Use the adjustment slots in the rack feet to fine-tune if needed.
- Test by applying downward pressure at each corner and trying to move the rack laterally. There should be zero movement.
Pro tip: After your first off-road drive, retighten all rack fasteners. Vibration can loosen nuts and bolts on new installations. Repeat after every major off-road trip for the first few months. |
Mounting the Rooftop Tent to the Rack
With the rack securely installed, you are ready to mount the tent. This step requires at least two people for soft-shell tents and is strongly recommended for hard-shell models as well.
Understanding the Mounting System
Almost all rooftop tents use one of two primary mounting systems:
- Universal T-slot / T-track system: T-bolts slide into the cross bar channel and the tent is secured with nuts and washers. The most common and versatile system.
- Clamp-on brackets: Proprietary brackets that clamp directly to the cross bars. Faster to install but less universal.
Step-by-Step Tent Mounting Process
- Gather your hardware. Lay out all supplied mounting hardware: T-bolts, washers, lock washers, and nuts. Count them to ensure nothing is missing before lifting the tent.
- Measure cross bar spread (centre-to-centre). Compare this to the tent manufacturer’s minimum and maximum mounting width. Your spread must fall within this range.
- Mark and slide T-bolts into the cross bar T-slots at positions matching the tent’s mounting holes. Do not tighten yet.
- Lift the tent onto the rack with an assistant at each end. For heavy hard-shell tents, use a trolley jack with a padded block to raise the tent to roof height, then slide it into position.
- Fit washers and hand-thread nuts. Place a flat washer and lock washer onto each T-bolt, then hand-thread the nut.
- Centre the tent on the vehicle before final tightening. Ensure it does not overhang past the rack’s rated width and clears door openings.
- Torque the mounting hardware in a cross pattern (20-30 Nm typical). Do not over-tighten aluminium base plates.
- Install the wind fairing or air deflector on the leading cross bar to reduce aerodynamic drag and wind noise at highway speeds.
Safety check: Open and close the tent 2-3 times to confirm the hinge moves freely without contacting the rack or vehicle body. Then shake the tent firmly in all directions. There should be absolutely no movement between the tent and the rack. |
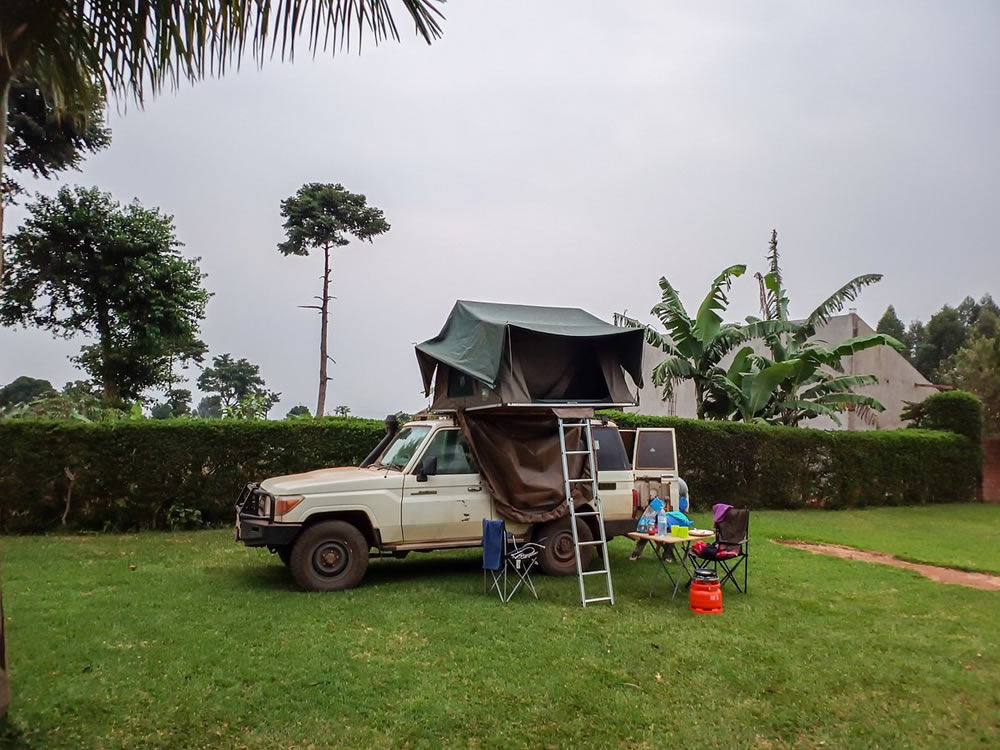
Setting Up Camp: Deploying the Rooftop Tent
Once your tent is mounted and your Land Cruiser arrives at a campsite, deploying the tent is a quick and satisfying process.
Selecting and Preparing the Camp Position
- Choose a level surface. Park on the flattest ground available. Aim for less than 5 degrees of tilt side-to-side. Use levelling ramps if needed.
- Check overhead clearance. Look for overhanging branches, power lines, or rock overhangs. You need clearance equal to the tent’s fully open height above the roof (1.2-1.6 m for soft-shells).
- Engage the handbrake and chock the wheels. Never deploy a rooftop tent without the handbrake firmly set. Use wheel chocks especially on slopes.
- Turn off the engine. Always deploy and sleep with the engine off.
Opening a Soft-Shell Rooftop Tent
- Remove the rain cover or carry bag. Unzip and fold the weather cover back. Stow it under the opened tent or in the provided bag to prevent UV degradation.
- Release all buckle straps (typically 2-4) securing the tent closed for travel.
- Unfold the tent with one person on each side. Lift the hinged lid upward and away from the vehicle. Guide the telescoping ladder rather than letting it drop.
- Extend the ladder to the ground at approximately 70-75 degrees for safe, easy climbing.
- Unfurl the inner fabric walls. Push out any folded fabric at the corners. Attach inner corner tension poles if your tent model uses them.
- Attach the outer fly if separate. Clip or hook it over the tent body and tension guy lines if wind is expected.
Opening a Hard-Shell Rooftop Tent
- Release the locking latches (typically 2-4) along the sides.
- Lift the shell. Gas struts will take the weight once partially open. Lock the shell in the open position using the safety stays before climbing in.
- Deploy the ladder. Unfold or slide out the integrated ladder and position it at a comfortable angle.
- Unzip entry and windows as desired for ventilation.
Setting Up the Sleeping Area
With the tent deployed, setting up a comfortable sleeping environment takes only a few minutes.
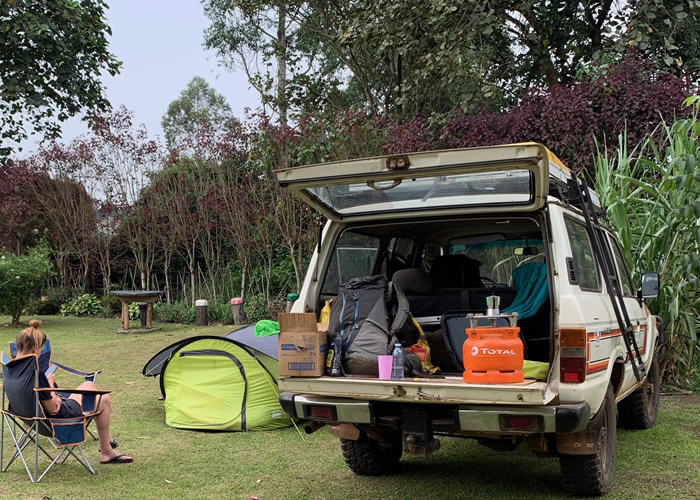
- Lay out the bedding. Unroll any bedding stored inside the tent. Keeping bedding inside the tent between uses saves time and keeps it dry.
- Fit a mattress topper if desired. A 5-10 cm memory foam topper dramatically improves comfort and insulates against cold. Many overlanders leave this permanently inside.
- Arrange sleeping bags or blankets. For cold conditions, use a bag rated at least 10 degrees below expected overnight temperatures.
- Organise the internal storage pockets for phones, headlamps, glasses, and other bedside essentials.
- Position interior lighting. Many modern tents have built-in LED strip lights. If yours does not, clip a USB or battery-powered LED light to a convenient pole or pocket.
Cold-weather tip: In sub-zero conditions, place a closed-cell foam mat under your sleeping bag as an additional insulation layer. Cold air circulates under the vehicle and can make the mattress surface cold from below. |
Setting Up the Annex (Optional)
An annex attaches to the base of the tent and hangs down to the ground, creating a sheltered space beneath for storing gear, changing clothes, or additional sleeping capacity.
- Locate the annex connection points. Most annexes connect to a zip or hook system running along the bottom of the tent fabric.
- Attach the annex top edge. Zip or clip the annex to the tent base on three sides, leaving the ladder side open or fitted with an entry door.
- Stake the annex walls. Push tent pegs through the base loops at an angle pointing away from the tent. Hammer them flush with the ground.
- Tension the guy ropes at the upper corners at 45-degree angles for stability in wind.
- Seal the floor (optional). Place a groundsheet or foam tiles inside the annex to keep the floor dry and comfortable.
Packing Down: Closing the Tent
Packing down efficiently improves with practice. Experienced overlanders can pack a soft-shell tent in under 10 minutes.
Packing a Soft-Shell Tent
- Remove all personal items, bedding, and loose gear from the tent.
- Shake out any debris and spot-clean any dirt.
- Fold the inner walls inward toward the mattress, keeping them flat.
- Fold the outer fly neatly over the tent body.
- Bring the tent lid down from the open position. Have one person hold the ladder while another presses the tent closed, tucking protruding fabric inside.
- Latch the buckle straps firmly. A loose strap can vibrate open at highway speed.
- Fit and fully zip the rain cover all the way around. A loose cover becomes a sail at speed and can tear.
Packing a Hard-Shell Tent
- Ensure all sleeping gear is stowed inside or removed.
- Disengage the shell support struts or safety stays.
- Lower the shell and press it firmly closed. Hard-shell gaskets may require pressure to seat fully.
- Engage all locking latches and double-check each one.
- Retract and secure the ladder.
Never drive with a wet soft-shell tent for extended periods. Prolonged moisture in the folded canvas encourages mould. If you must travel wet, air the tent out fully as soon as possible. |
Safety Considerations
Rooftop tents raise your vehicle’s centre of gravity and change its handling characteristics. The following safety practices are non-negotiable.
- Never exceed the roof rack or vehicle roof load rating, including the weight of sleeping occupants.
- Always engage the handbrake and use wheel chocks before deploying the tent.
- Inspect the ladder footing before climbing. On soft ground, use a flat rock, plank, or dedicated ladder base plate to prevent sinking.
- Do not cook inside or directly under the tent. Use a separate camp kitchen setup well away from the vehicle.
- Install a carbon monoxide detector if sleeping in areas with generators or running vehicles nearby.
- In high winds (above 50 km/h), close the tent and sleep inside the vehicle. A rooftop tent is not a storm shelter.
- Check all mounting hardware before every trip. Highway vibrations can loosen fasteners over time.
- Never attempt to drive with the tent in the open position, even for short distances.
Maintenance and Care
A well-maintained rooftop tent will last 10-20 years. The following routine will keep yours in top condition.
Canvas / Soft-Shell Maintenance
- Seam sealing: Re-apply seam sealer to all stitched seams every 12-24 months, or whenever you notice minor leaks. Use a brush-on product compatible with polyester-cotton canvas.
- Waterproofing re-treatment: Apply a DWR (durable water repellent) spray to the outer canvas once per year or after heavy use. Products such as Nikwax Canvas Proof are well-suited for this purpose.
- Mould prevention: Never pack a wet tent. If mould appears, clean with diluted vinegar solution (1:3 vinegar to water), scrub gently with a soft brush, rinse, and dry completely in the sun.
- Zipper care: Lubricate all zips with a dedicated zipper wax every few months. Avoid petroleum-based products which degrade zipper tape.
Hard-Shell Maintenance
- Check and lubricate gas struts every 12 months. Weak struts are a common failure point on older hard-shell tents.
- Inspect the shell seal or gasket for cracks or compression set. Replace if it no longer seals properly in rain.
- Clean the ABS or aluminium shell with mild automotive shampoo. Avoid harsh solvents that can degrade seals or plastic.
Hardware and Rack Checks
- Torque check: Re-torque all rack and tent mounting bolts after the first off-road trip and every 3 months thereafter.
- Corrosion inspection: Check all bolts, T-nuts, and rack feet for rust, especially after beach or saltwater exposure. Replace affected hardware promptly.
- Ladder inspection: Check all hinges and rungs for cracks or bending. A compromised ladder is a fall hazard.
Recommended Gear Checklist
Beyond the tent and rack, a well-kitted rooftop tent setup benefits from the following accessories:
Item | Purpose / Notes |
Ladder base plate | Prevents ladder feet sinking into soft ground |
Mattress topper (5-10 cm memory foam) | Dramatically improves sleeping comfort |
Sleeping bag rated -10 degrees C or colder | Cold nights arrive unexpectedly; always over-prepare |
Annex / awning combination | Extends usable covered living space |
USB LED interior light strip | Essential if tent does not include built-in lighting |
Carbon monoxide detector | Safety essential for enclosed sleeping environments |
Seam sealer (brush-on) | Annual maintenance for all stitched seams |
DWR waterproofing spray | Re-treat canvas every season or after heavy rain |
Wheel chocks x4 | Mandatory safety item before deploying on any terrain |
Torque wrench | Required for correct installation and maintenance checks |
Solar panel / dual battery system | Power for lights, devices, and fans overnight |
Frequently Asked Questions
Can I leave my rooftop tent mounted permanently?
Yes, most owners leave their tent mounted year-round. Be aware of the constant aerodynamic drag (expect a 10-20% reduction in fuel economy at highway speeds), the ongoing dynamic load, and the additional height clearance requirement (typically adding 400-600 mm to vehicle height). Always know your loaded vehicle height before approaching low bridges or car parks.
Can I sleep in the tent on uneven ground?
You can sleep on a moderate slope (up to about 10-12 degrees), but comfort decreases significantly beyond 5 degrees. Always orient the vehicle so the head-end of the mattress is uphill. Invest in quality levelling ramps for frequently uneven campsites.
How do I prevent condensation inside the tent?
Condensation forms when warm, moist body air meets cooler tent fabric. Minimise it by always sleeping with at least two windows cracked for cross-ventilation, using a breathable sleeping bag, and choosing a tent with a canvas inner layer rather than polyester, as canvas breathes significantly better.
What is the maximum speed I should drive with a rooftop tent?
Most manufacturers recommend a maximum of 130 km/h with a rooftop tent. At higher speeds, aerodynamic loads increase exponentially and can stress tent hinges, cover straps, and mounting hardware. A wind fairing significantly reduces this stress at all speeds.
How do I clean bird droppings or tree sap off the tent shell?
Use warm water with mild soap and a soft microfibre cloth. For tree sap on hard shells, a small amount of isopropyl alcohol on a cotton pad dissolves sap without damaging the surface. Avoid abrasive scrubbers.
Conclusion
Setting up a rooftop tent on your Toyota Land Cruiser is one of the most impactful upgrades you can make for overlanding and adventure travel. The combination of the Land Cruiser’s legendary durability with a quality rooftop tent creates a truly capable, self-sufficient camping platform.
Follow the installation steps carefully, always respect your vehicle’s load limits, develop the habit of pre-trip hardware checks, and care for the tent fabric regularly. With these practices in place, your rooftop tent setup will deliver countless nights of comfortable, elevated sleep in some of the world’s most spectacular locations.
Drive far, camp well, and leave no trace.